

What’s the Difference Between Pipe Clamps and Parallel Clamps for Panel Glue Ups?
Pipe clamps and parallel clamps are both essential tools for woodworking panel glue ups, but they work differently. Pipe clamps slide onto steel pipes of various lengths, offering unlimited reach and adjustability. Parallel clamps feature fixed jaw widths and maintain consistent pressure across the entire clamping surface. For panel assembly, parallel clamps deliver superior results because their jaws stay perfectly parallel throughout the clamping stroke. This prevents racking and ensures even glue distribution across large surfaces. Pipe clamps excel at reaching deep into assemblies but require more setup time and careful alignment.

When choosing between these two clamp types, consider your project scope and workspace. Parallel clamps work best for flat panel work where precision matters most. Pipe clamps offer flexibility for irregular shapes and larger assemblies. Most serious woodworkers use both types strategically, deploying each where it performs best. Your budget, available storage space, and typical project sizes should guide your investment decision.
Key Takeaway: Parallel clamps excel at panel glue ups due to their rigid, parallel jaws; pipe clamps offer flexibility for larger or irregular assemblies.
How Do Pipe Clamps Perform in Panel Glue Up Applications?
Pipe clamps have been the woodworking standard for decades. They consist of a clamp head that slides onto standard steel pipe, allowing you to customize the clamping length. You can purchase 1/2-inch or 3/4-inch diameter pipes cut to any length you need. This modularity makes pipe clamps incredibly economical for one-time large projects. A single pair of clamp heads can work with multiple pipe lengths, reducing overall tool investment.

Advantages of Pipe Clamps for Panel Work
Pipe clamps offer several distinct benefits for panel glue ups:
- Unlimited reach—customize pipe length to match your panel dimensions exactly.
- Budget-friendly—purchase clamp heads separately from inexpensive steel pipe.
- Versatile—one set of heads works with multiple pipe lengths.
- Deep throat depth—access interior portions of large assemblies easily.
- Proven reliability—decades of successful use across woodworking shops.
Limitations When Using Pipe Clamps
Despite their popularity, pipe clamps have notable drawbacks for precision panel work. The clamping force is not perfectly parallel—the jaws can angle slightly, causing uneven pressure. This racking tendency requires careful setup and monitoring. Pipe clamps also tend to twist under load if not properly aligned. Setup time is longer because you must position the pipe, align the clamp head, and verify parallelism before applying pressure.
Pipe storage presents another challenge. Long pipes occupy significant wall or floor space in your workshop. Rusting can occur if pipes aren’t properly maintained, especially in humid environments. The friction between clamp head and pipe can create inconsistent clamping force, requiring operator experience to achieve reliable results.
Key Takeaway: Pipe clamps offer economy and reach but demand careful alignment and create workspace storage challenges.
Why Are Parallel Clamps Superior for Panel Glue Ups?
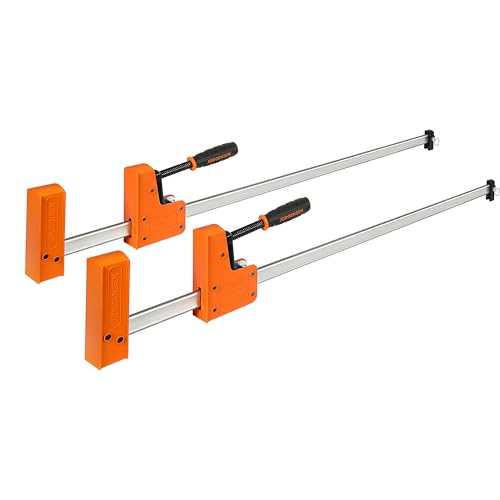
Parallel clamps represent modern clamping technology engineered specifically for precision work. Their dual-rail design ensures both jaws remain perfectly parallel throughout the entire clamping stroke. This parallel action distributes pressure evenly across your entire panel surface, preventing the racking and twisting that plague pipe clamps. Parallel clamps maintain consistent clamping force from start to finish, eliminating guesswork from the equation. For panel assemblies where flatness and accuracy matter, parallel clamps deliver superior results with less operator skill required.

Key Performance Features of Parallel Clamps
Modern parallel clamps incorporate several design advantages:
- Parallel jaw action—maintains perfect alignment throughout the clamping stroke.
- Even pressure distribution—prevents panel racking and warping during glue-up.
- Faster setup—no pipe alignment needed; clamp and tighten.
- Compact storage—much smaller footprint than equivalent pipe clamps.
- Consistent clamping force—mechanical design delivers repeatable results.
- Wide jaw capacity—handles panels from small to medium sizes efficiently.
Practical Advantages for Woodworkers
Parallel clamps speed up your workflow significantly. You eliminate the alignment step that pipe clamps require. Simply position the clamp, engage the mechanism, and tighten. The parallel jaws ensure your panel stays flat and square without constant monitoring. This is particularly valuable when you’re managing multiple clamps across a large assembly. One person can often accomplish what might require two people using pipe clamps. The reduced cognitive load makes parallel clamps ideal for complex multi-panel glue ups where precision is critical.
Parallel clamps also protect your workpiece better. The smooth, wide jaw faces distribute pressure across a larger area than pipe clamp jaws, reducing the risk of marring or crushing delicate wood. You can work faster with confidence that your panel will remain flat and square throughout the curing process.
Key Takeaway: Parallel clamps deliver faster setup, perfect jaw alignment, and superior panel flatness compared to pipe clamps.
How Should You Choose Between Pipe and Parallel Clamps for Your Workshop?
Your decision depends on your typical project scope, budget constraints, and workshop space. If you primarily work on small to medium-sized panels and value precision, parallel clamps are the better investment. Their speed and reliability justify the higher per-unit cost for regular users. If you occasionally tackle large custom projects or work with irregular shapes, pipe clamps offer flexibility that parallel clamps cannot match. Many professional shops maintain both types, using each strategically based on the specific job.

Budget Considerations
Parallel clamps cost significantly more per clamp than pipe clamps. A quality parallel clamp runs 50-100 dollars, while pipe clamp heads cost 15-30 dollars. However, you need multiple clamps for effective panel work. For a complete panel glue-up setup, you might need 4-6 clamps. Budget 200-600 dollars for parallel clamps versus 100-200 dollars for pipe clamps plus pipe. The initial investment for parallel clamps is higher, but the time savings and reliability often justify the expense for serious woodworkers.
- Parallel clamps: 50-100 dollars each; buy 4-6 for panel work.
- Pipe clamps: 15-30 dollars per head; add pipe cost separately.
- Parallel clamps save time on every project; faster ROI for active shops.
- Pipe clamps suit occasional large projects better than daily use.
Space and Maintenance Requirements
Parallel clamps stack neatly on shelves or pegboards, occupying minimal space. Pipe clamps require dedicated wall storage or floor space for long pipes. If your workshop is tight, parallel clamps are the practical choice. Maintenance also favors parallel clamps—they need occasional cleaning and lubrication. Pipe clamps demand regular inspection for rust, especially in humid climates. Treating pipes with rust preventative oil adds to maintenance overhead.
Key Takeaway: Choose parallel clamps for precision panel work and limited space; choose pipe clamps for occasional large projects and tight budgets.
What Are the Best Practices for Panel Glue Ups Using Either Clamp Type?
Successful panel glue ups require proper technique regardless of clamp type. Start by ensuring all mating surfaces are perfectly flat and properly jointed. Apply glue evenly across the joint surfaces using a glue brush or roller. Position clamps perpendicular to the grain direction to minimize racking forces. Tighten clamps gradually and evenly, alternating between opposite sides to maintain panel flatness. Check for square using diagonal measurements—they should be equal if your assembly is square.

Step-by-Step Panel Glue-Up Process
Follow this proven procedure for reliable results:
- Prepare all components—mill to final thickness, cut to length, and verify fit without glue.
- Dry-clamp your assembly—practice the sequence without applying glue first.
- Apply glue to all mating surfaces using even, consistent coverage.
- Position clamps perpendicular to grain direction, spaced evenly across the panel.
- Tighten gradually in a crisscross pattern, checking for square frequently.
- Allow sufficient curing time—24 hours minimum for most wood glues.
- Remove clamps carefully to avoid damaging the finished surface.
Monitoring and Adjustment During Curing
Check your glue-up every 15-30 minutes during the first hour. Look for excess glue squeeze-out, which indicates proper pressure. Verify that your panel remains flat and square by checking diagonal measurements. If racking occurs, loosen the clamps slightly and reposition them. With parallel clamps, this adjustment is quick and easy. With pipe clamps, you may need to add shims or adjust the pipe position to correct alignment issues.
Temperature and humidity affect glue curing significantly. Most woodworking glues perform best between 65-75 degrees Fahrenheit. Humidity should be moderate—not excessively dry or damp. Plan your glue-ups accordingly, avoiding extreme weather conditions. Once clamps are tightened, resist the urge to tighten them further. Excessive clamping pressure can starve the joint of glue, creating weak bonds.
Key Takeaway: Successful panel glue ups require proper preparation, gradual clamping, and careful monitoring throughout the curing process.
Frequently Asked Questions
Can I use pipe clamps and parallel clamps together on the same panel?
Yes, many woodworkers combine both clamp types strategically. Use parallel clamps on the main panel surfaces for even pressure and flatness. Use pipe clamps to reach deep into the assembly or handle irregular shapes. This hybrid approach leverages the strengths of each type. Ensure clamps are positioned to complement each other rather than fight against one another.
How many clamps do I need for a typical panel glue up?
Most woodworkers recommend one clamp per 12-18 inches of panel width. A 48-inch-wide panel typically needs 3-4 clamps. Larger panels or those with multiple components may require 6-8 clamps. Spacing clamps evenly prevents racking and ensures uniform pressure. Err on the side of more clamps rather than fewer—excessive clamps are better than insufficient clamping pressure.
What’s the ideal clamping pressure for wood glue ups?
Most wood glues require 100-200 pounds of clamping force per square inch of joint area. You don’t need extreme pressure—moderate, consistent pressure is ideal. Excessive force can starve joints of glue, weakening the bond. Modern parallel clamps deliver consistent pressure that’s usually adequate without over-tightening. With pipe clamps, tighten until you see glue squeeze-out, then stop.
Do parallel clamps work for edge-gluing boards?
Parallel clamps excel at edge-gluing boards for panel construction. Their parallel jaws prevent the boards from sliding or racking during clamping. Position clamps alternately above and below the joints to maintain flatness. Parallel clamps deliver superior results compared to pipe clamps for this specific application. They’re particularly valuable when edge-gluing multiple boards simultaneously.
How do I prevent panel cupping during glue ups?
Position clamps perpendicular to the grain direction to resist racking forces. Use adequate clamping pressure—too little allows movement, too much starves joints. Ensure all components are properly milled to consistent thickness. Apply glue evenly across all joints. After removing clamps, allow the panel to acclimate to your workshop humidity before final machining. Parallel clamps minimize cupping risk significantly compared to pipe clamps.
Can pipe clamps damage delicate wood surfaces?
Pipe clamp jaws can leave marks on soft woods if not protected. Place scrap wood blocks between the clamp jaws and your workpiece. Parallel clamps have wider jaw faces that distribute pressure more evenly, reducing the need for protective blocks. However, protective blocks are always recommended regardless of clamp type. This simple precaution prevents surface damage and ensures professional results.
Which Clamp Type Should You Choose for Your Panel Glue Ups?
The choice between pipe clamps and parallel clamps ultimately depends on your specific needs and workshop priorities. Parallel clamps deliver superior performance for panel glue ups due to their parallel jaw action, faster setup, and consistent clamping force. They’re ideal if you regularly build flat, precision panels and value time efficiency. If you occasionally tackle large custom projects, work with irregular shapes, or operate on a tight budget, pipe clamps remain a practical choice. For serious woodworkers, owning both types allows you to deploy each strategically based on the project at hand.
Consider your workshop space, typical project scope, and budget when making your investment decision. Start with parallel clamps if precision panel work is your focus. Add pipe clamps later for specialized applications. Many professional shops maintain 4-6 parallel clamps plus 2-3 pipe clamp sets for maximum flexibility. Your clamping strategy should support your woodworking goals while fitting your budget and workspace constraints. For more detailed comparisons of specific clamp brands, see our Dubuque Aluminum Bar Clamps vs Bessey comparison.
Key Takeaway: Parallel clamps are superior for precision panel work; pipe clamps offer budget-friendly flexibility for occasional large projects.




Write Your Review
No reviews yet. Be the first to share your experience!