What Is a Japanese Flush Cut Kugihiki Saw and Why Should You Learn to Use One?
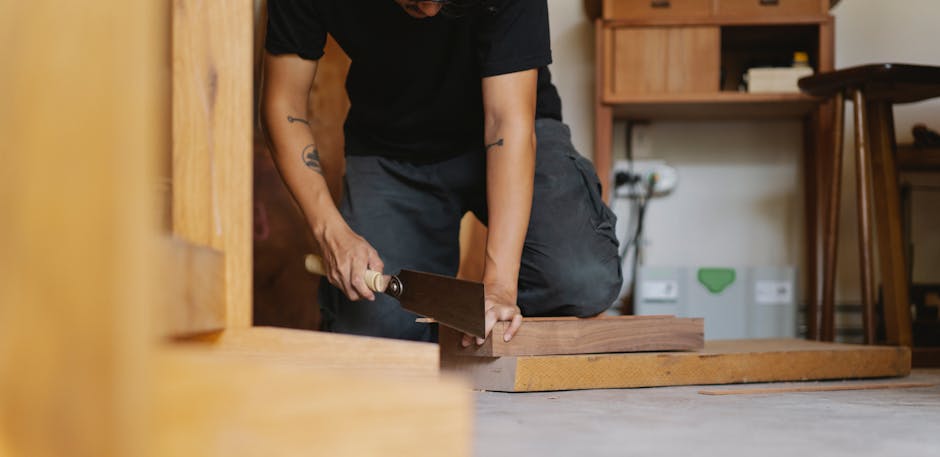
A Japanese flush cut kugihiki saw is a specialized pull-saw designed to cut wooden dowels and protruding fasteners flush with the wood surface. Unlike Western push saws, the kugihiki pulls toward the user, delivering precise cuts with minimal effort. This tool excels in fine woodworking, furniture repair, and cabinetry where flush surfaces are essential. The blade’s thin profile and sharp teeth make it ideal for delicate work without splintering or damaging surrounding material.
The kugihiki differs fundamentally from other Japanese saws. Its curved blade and unique tooth geometry allow for cuts that leave nearly invisible seams. Woodworkers, luthiers, and furniture makers rely on this saw for professional-quality results. Learning proper technique prevents blade damage, reduces hand fatigue, and ensures clean cuts every time.
Key Takeaway: The kugihiki saw is essential for flush-cutting dowels and fasteners with precision that Western saws cannot match.
How Do You Grip and Position Your Body When Using a Kugihiki Saw?
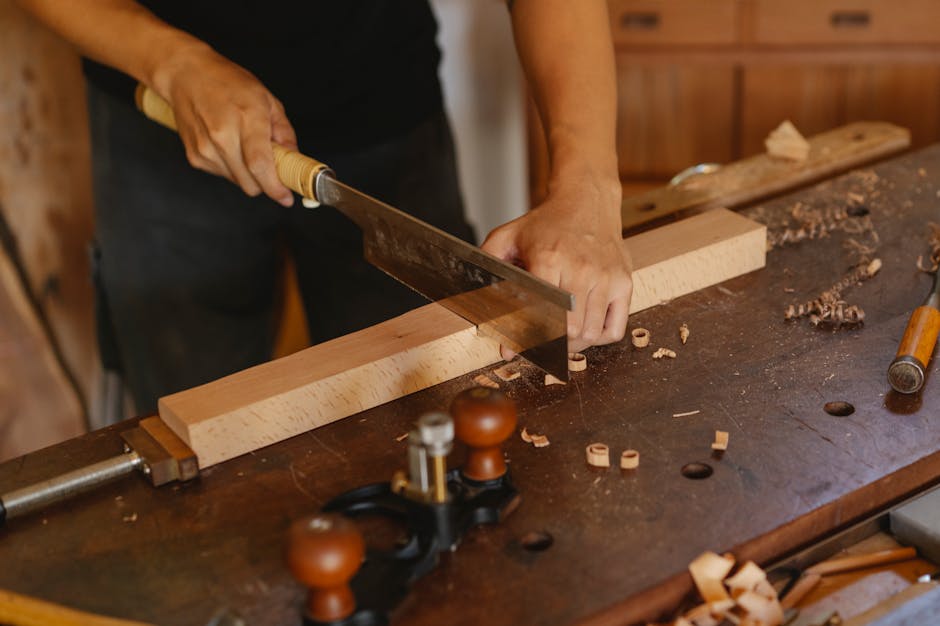
Proper grip and posture determine cutting accuracy and control. Hold the handle with a relaxed, neutral grip—not too tight. Your thumb should rest naturally on the handle side, not wrapped underneath. Position your body at a slight angle to the workpiece, with your shoulder relaxed and elbow bent at approximately 90 degrees.
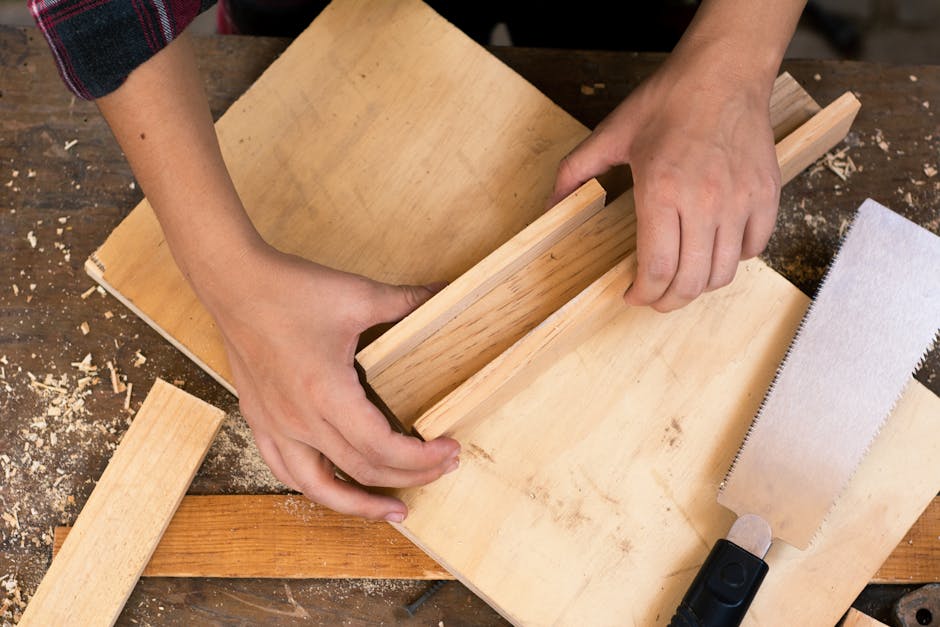
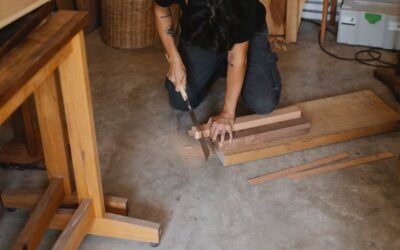
Stance matters as much as grip. Stand with feet shoulder-width apart, knees slightly bent. Keep the workpiece at waist height for optimal leverage and visibility. Your non-dominant hand should stabilize the workpiece firmly but not rigidly. This setup reduces fatigue and gives you better control throughout the cut.
Essential Grip and Posture Elements
- Hold the handle with fingers relaxed, not white-knuckled tension.
- Keep your wrist straight and aligned with your forearm during the cut.
- Position the saw blade perpendicular to the dowel or fastener surface.
- Maintain a comfortable stance with knees slightly bent for shock absorption.
- Use your body weight to guide the saw, not just arm strength.
Many beginners grip too tightly, causing hand cramps and poor cut quality. A light grip actually improves control because the saw’s weight and sharp teeth do most of the work. You’re guiding, not forcing.
Key Takeaway: Relaxed grip, proper posture, and stable workpiece positioning are the foundation of successful flush cutting.
What Is the Correct Cutting Technique for Flush Cuts?
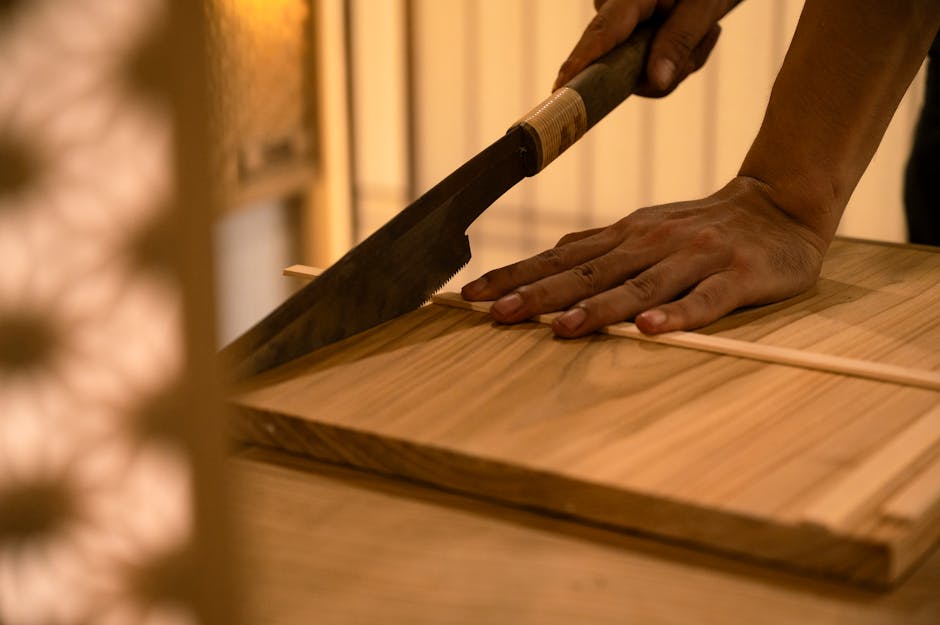
The kugihiki operates on the pull stroke, unlike Western saws. Begin with light, shallow strokes to establish a guide groove. The saw blade should start at a very shallow angle—nearly parallel to the wood surface. Gradually increase pressure and angle as the blade settles into the groove. Let the sharp teeth do the cutting; your job is to maintain consistent pressure and angle.
Smooth, rhythmic strokes produce the best results. Pull the saw toward your body in one fluid motion, then release pressure on the return stroke. Never push the blade back into the wood. The cutting happens only on the pull stroke, so the return is purely repositioning. Maintain steady speed throughout—rushing causes chattering and rough cuts.
Step-by-Step Cutting Process
- Mark the cut line: Use a sharp pencil or marking knife to indicate the flush surface level.
- Position the blade: Start at the shallow angle, almost flat against the wood.
- Make initial strokes: Use light pressure for the first 3-5 pulls to establish the guide groove.
- Increase pressure gradually: As the groove deepens, increase downward pressure slightly.
- Maintain rhythm: Keep pulling at a steady pace without hesitation.
- Finish carefully: Reduce pressure on the final strokes to prevent splintering or blade binding.
The shallow starting angle is critical. If you begin with the blade too vertical, it will bounce and chatter. The angle should be roughly 15-20 degrees from horizontal initially, gradually increasing to 30-40 degrees as you progress. This technique prevents blade deflection and produces glass-smooth surfaces.
Key Takeaway: Start shallow, use light pressure, and let the saw’s sharp teeth do the work through steady, rhythmic pull strokes.
How Do You Maintain and Care for Your Kugihiki Saw?
Proper maintenance extends blade life and ensures consistent performance. After each use, wipe the blade clean with a dry cloth to remove sawdust and moisture. Never leave the saw wet or exposed to humidity, as this causes rust on the steel blade. Store the saw in a dry location, ideally with a blade guard or wooden sheath to protect the teeth and prevent accidental contact.
Blade sharpening requires professional expertise in most cases. Japanese saws are traditionally sharpened by specialized craftspeople who understand the specific tooth geometry and steel hardness. Attempting DIY sharpening risks damaging the blade permanently. If your kugihiki becomes dull, contact a Japanese tool specialist or woodworking supply shop for professional sharpening services.
Maintenance Checklist
- Wipe the blade with a dry cloth immediately after use.
- Store in a dry environment away from humidity and temperature fluctuations.
- Use a blade guard or wooden sheath for safe storage.
- Never force a dull blade through wood—send it for professional sharpening.
- Inspect the handle periodically for cracks or looseness.
- Keep the blade free from rust by maintaining dry storage conditions.
Handle maintenance is equally important. If your kugihiki has a wooden handle, occasionally apply a light coat of linseed oil to prevent cracking. Tighten any loose fasteners connecting the blade to the handle. A well-maintained kugihiki can last decades and remain sharp enough for precision work.
Key Takeaway: Keep your blade dry, store it safely, and have professionals sharpen it when needed to maintain performance.
What Are Common Mistakes When Using a Kugihiki Saw?
Beginners often grip too tightly, causing hand fatigue and reduced control. Forcing the saw through the wood instead of using light, steady pressure leads to chattering and rough cuts. Starting with too steep a blade angle prevents the guide groove from forming properly. Many users also neglect proper workpiece stabilization, resulting in movement that throws off the cut alignment.
Pushing on the return stroke is a critical error. The kugihiki only cuts on the pull stroke; pushing backward dulls the blade and wastes energy. Another common mistake is attempting to cut through thick fasteners or hardened steel with a woodworking saw. The kugihiki is designed for wood dowels and soft metals—using it on hardened fasteners damages the blade permanently.
Mistakes to Avoid
- Gripping too tightly causes hand cramps and reduces cutting control.
- Starting with a steep blade angle prevents proper guide groove formation.
- Pushing on the return stroke dulls the blade and wastes effort.
- Forcing the saw through wood creates chattering and rough surfaces.
- Using the kugihiki on hardened steel or non-wood materials damages the blade.
- Failing to stabilize the workpiece causes misaligned cuts and safety hazards.
Understanding these pitfalls helps you develop correct technique faster. Watch experienced woodworkers demonstrate the saw in action—video tutorials show the subtle movements that make the difference between amateur and professional results.
Key Takeaway: Avoid tight gripping, proper angle selection, and forcing—let the saw’s design and sharp teeth handle the cutting work.
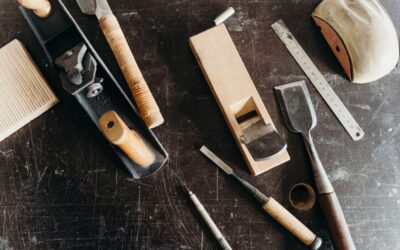
How Does the Kugihiki Compare to Other Japanese Saws for Specific Tasks?
The kugihiki is specialized for flush cutting, while other Japanese saws excel at different tasks. If you’re choosing between multiple saws, understanding their unique purposes prevents purchasing unnecessary tools. For a detailed comparison of Japanese saw types and their applications, see our guide on Dozuki vs Ryoba vs Kataba Saw: Key Differences Explained in 2026.
The ryoba saw handles general crosscutting and ripping. The dozuki excels at precise joinery and fine detail work. The kataba cuts in one direction only, offering specialized performance. The kugihiki stands apart—it’s the only saw designed specifically for flush cutting dowels and fasteners without damaging surrounding wood.
Task-Based Saw Selection
- Flush cutting dowels: Kugihiki is the only appropriate choice.
- General crosscutting: Ryoba handles most general cutting tasks efficiently.
- Fine joinery: Dozuki provides the precision required for tight-fitting joints.
- Specialized ripping: Kataba excels when cutting along the grain in one direction.
Investing in a quality kugihiki is worthwhile if you regularly work with dowels or exposed fasteners. For occasional use, borrowing or renting from a tool library is economical. Professional woodworkers typically own one kugihiki for every 2-3 other Japanese saws in their collection.
Key Takeaway: The kugihiki is irreplaceable for flush cutting; other Japanese saws serve different purposes and cannot substitute.
What Safety Precautions Should You Take When Using a Kugihiki Saw?
Japanese saws have razor-sharp blades that demand respect and careful handling. Always keep your non-cutting hand behind the blade plane, never in front of it. Secure the workpiece firmly before beginning any cut. Never reach across the blade or attempt to catch a falling workpiece. Wear safety glasses to protect against sawdust and small wood fragments that may be ejected during cutting.
Transport and storage safety is equally important. Always use a blade guard or wooden sheath when moving the saw. Store it where children or untrained individuals cannot access it. Keep the blade away from other tools to prevent accidental contact and damage. A moment of carelessness with a sharp blade can cause serious injury.
Safety Best Practices
- Wear safety glasses during every cutting session.
- Keep your non-cutting hand behind the blade at all times.
- Secure the workpiece firmly before cutting.
- Use a blade guard or sheath for safe storage and transport.
- Never reach across the blade or attempt to catch falling pieces.
- Keep the blade away from children and untrained users.
First aid knowledge is essential. If you accidentally cut yourself, apply direct pressure with a clean cloth and seek medical attention if the wound is deep. Most minor cuts from woodworking saws heal quickly with proper care, but serious injuries require professional medical evaluation.
Key Takeaway: Respect the blade’s sharpness, secure your workpiece, and use proper guards to prevent serious injury.
How Can You Practice and Improve Your Kugihiki Technique?
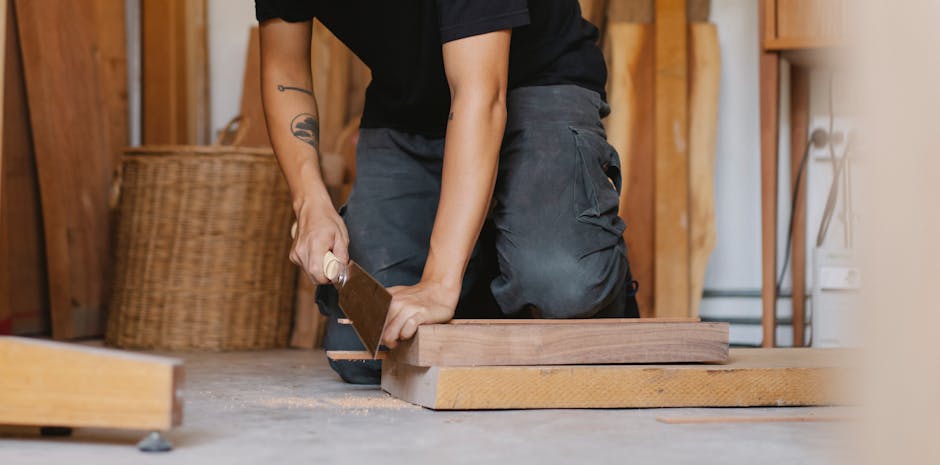
Start with softwood practice pieces before moving to fine furniture projects. Softwoods like pine and poplar are forgiving and help you develop muscle memory without wasting expensive hardwoods. Make practice cuts on scrap dowels and fasteners to build confidence. Record yourself using the saw, then compare your technique to videos of experienced woodworkers. Small adjustments in grip, angle, or pressure often produce dramatic improvements in cut quality.
Join a woodworking club or class where you can watch and learn from experienced craftspeople. Many community colleges and maker spaces offer Japanese saw training. Hands-on instruction accelerates learning far faster than videos alone. Practice consistently—even 15 minutes weekly builds competence and muscle memory that lasts.
Practice Progression Plan
- Week 1-2: Practice on softwood scrap with basic grip and posture.
- Week 3-4: Attempt flush cuts on practice dowels in visible locations.
- Week 5-6: Graduate to hardwood practice pieces and tighter tolerances.
- Week 7+: Apply technique to actual woodworking projects with confidence.
Keep a practice journal noting what works and what doesn’t. Record blade angle, pressure level, and stroke speed for cuts that produce excellent results. This documentation helps you replicate success consistently. Over time, excellent technique becomes automatic, requiring no conscious thought.
Key Takeaway: Start with softwood scrap, practice consistently, and learn from experienced woodworkers to develop reliable technique.
Frequently Asked Questions
Can you use a kugihiki saw on metal fasteners?
The kugihiki is designed primarily for wood dowels and soft metals like brass or aluminum. Never attempt to cut hardened steel or stainless steel fasteners—this dulls or damages the blade permanently. For metal fasteners, use a specialized hacksaw or reciprocating saw designed for metal cutting. Always check your saw’s specifications before attempting non-wood materials.
How often should you sharpen a kugihiki saw?
Professional use may require sharpening every 6-12 months, while hobby woodworkers might sharpen annually or less frequently. Send your saw to a specialized Japanese tool sharpener when it becomes visibly dull or produces rough cuts despite proper technique. Attempting DIY sharpening risks permanent blade damage. Budget $30-60 for professional sharpening services.
What’s the difference between a kugihiki and a flush cut saw?
Kugihiki is the Japanese term for flush cut saw. The terms are interchangeable—both describe the same tool designed for cutting dowels and fasteners flush with wood surfaces. Japanese kugihiki saws typically feature superior blade steel and sharper teeth than Western flush cut saws, resulting in cleaner cuts and longer blade life.
Is a kugihiki saw suitable for beginners?
Yes, beginners can learn to use a kugihiki effectively with proper instruction and practice. The pull-stroke design actually makes it easier to control than Western push saws. Start with softwood practice pieces and focus on relaxed grip and proper angle. Within a few hours of practice, most beginners achieve acceptable results.
Can you cut curves with a kugihiki saw?
The kugihiki is designed for straight flush cuts only. Its rigid blade cannot navigate curves or angles. For curved cuts, use a coping saw or Japanese curved saw instead. The kugihiki’s strength lies in precision straight cutting, not versatility in cut shapes.
What should you do if your kugihiki blade becomes bent?
A bent kugihiki blade cannot be straightened safely and will not cut properly. Contact the manufacturer or a Japanese tool specialist about blade replacement options. Some high-quality kugihiki saws have replaceable blades, while others require sending the entire saw for professional restoration. Prevention through careful storage and handling is far more economical than repair.
How Can You Master the Japanese Flush Cut Kugihiki Saw in 2026?
Mastering the kugihiki requires understanding its unique design, developing proper technique, and practicing consistently. Start with relaxed grip, correct posture, and shallow blade angles. Let the saw’s sharp teeth do the cutting work through steady, rhythmic pull strokes. Maintain your tool through regular cleaning and professional sharpening to ensure years of reliable performance.
The kugihiki is an investment in woodworking excellence. Unlike Western flush cut saws, Japanese kugihiki saws deliver professional-quality results that transform furniture projects. Whether you’re a hobbyist or professional woodworker, this specialized tool deserves a place in your shop. With proper technique and consistent practice, you’ll produce flush cuts so clean they’re nearly invisible—the hallmark of master craftsmanship.
Begin your kugihiki journey today. Purchase a quality saw from a reputable Japanese tool supplier, invest time in learning proper technique, and practice on scrap wood before tackling valuable projects. The skills you develop will serve you for decades, producing work that reflects true craftsmanship and attention to detail.
Key Takeaway: Master the kugihiki through proper grip, technique, and consistent practice to achieve professional-quality flush cuts that define fine woodworking.

Write Your Review
No reviews yet. Be the first to share your experience!